SRE agent is an AI agent that can monitor application and infrastructure logs, diagnose issues, and report on diagnostics following an error in an application. Hook up your Kubernetes cluster, GitHub repository and Slack and let the agent summarise and diagnose issues to your team.
SRE-Agent-Demo.mp4
To gain a better understanding of best practices, costs, security and performance of AI agents in production systems, we wanted to create and share an example through open-source development. See our
Please feel free to follow along and
- Debugging issues - finds the root cause of application and system errors
- Kubernetes logs - queries Kubernetes cluster for information and application logs
- GitHub server - search your application GitHub repository to find respective bugs in code
- Slack integration - report and update your team in Slack
- Triggerable from anywhere with a diagnose endpoint
We use the Model Context Protocol (MCP) created by Anthropic to connect the LLM to the provided tools.
This repository demonstrates how AI agents can accelerate your debugging process and reduce application downtime.
To run this demo, you'll need an application deployed on Kubernetes. If you don't have one yet, you can use our modified microservices demo repository, where we have intentionally introduced errors to showcase the agent's diagnostic capabilities.

- Docker
- A configured
.envfile in the project root directory. See the Environment Variables section below for details. - An application deployed in AWS on Kubernetes for the agent to interact with.
We currently support two deployment methods for the MCP servers and client, one locally, and one on AWS.
The easiest way to run the agent is to use Docker Compose locally.
The fully orchestrated SRE Agent can be deployed with Docker Compose, which spins up all the required services — Slack, GitHub, the Kubernetes MCP servers, and an orchestration service that acts as a proxy between the LLM and the backend services. This orchestration service is the client in the context of MCP.
For Terraform-based infrastructure deployment, see the
Before running the agent, there are a few things we need to set up.
1. Giving the Agent Access to Your Kubernetes Cluster (i.e. the cluster where your application is running)
Currently, the agent only supports applications running on EKS (Elastic Kubernetes Service).
To connect your agent to EKS:
-
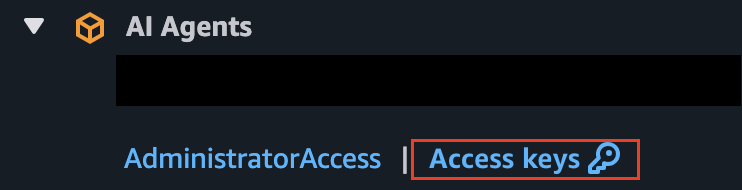
Go to your AWS access portal and click on Access keys:
-
Choose Option 2, and copy the credentials into your ~/.aws/credentials file as shown:

The file should look something like this:
[1233456789_AgentAccessRole]
aws_access_key_id=ABCDEFG12345
aws_secret_access_key=abcdefg123456789
aws_session_token=abcdefg123456789....=- Update the profile name to
[default], so it becomes:
[default]
aws_access_key_id=ABCDEFG12345
aws_secret_access_key=abcdefg123456789
aws_session_token=abcdefg123456789....=This project requires several environment variables for configuration. A template file, .env.example, is provided in the root directory as a reference.
Create a file named .env in the project root and add the following variables:
SLACK_BOT_TOKEN: The token for the sre-agent Slack bot. If you haven’t set up a Slack app yet, check out this page to create one.SLACK_TEAM_ID: The ID of the Slack team where the agent operates.CHANNEL_ID: The specific Slack channel ID for the agent's responses.GITHUB_PERSONAL_ACCESS_TOKEN: A GitHub personal access token with permissions to read relevant files.ANTHROPIC_API_KEY: An API key for Anthropic, used for processing tool requests.DEV_BEARER_TOKEN: A bearer token (password) for developers to directly invoke the agent via the/diagnoseendpoint. (This can be anything)SLACK_SIGNING_SECRET: The signing secret associated with the Slacksre-agentapplication.TOOLS: A JSON string array listing the enabled tools. Example:'["list_pods", "get_logs", "get_file_contents", "slack_post_message"]'QUERY_TIMEOUT: The maximum time (in seconds) allowed for the agent to diagnose an issue. (Default:300)TARGET_EKS_CLUSTER_NAME: The name of the target AWS EKS cluster the agent will interact with.HF_TOKEN: The Hugging Face Hub access token, ensure this has read access to https://huggingface.co/meta-llama/Llama-Prompt-Guard-2-86M, read the article here to set up this token.
To start the agent, simply run:
docker compose up --buildDeploy with ECR images
See
docker compose -f compose.ecr.yaml up
Note
AWS credentials must be stored in your ~/.aws/credentials file.
Once everything is up and running, you should see output similar to this:
...
orchestrator-1   |    FastAPI   Starting production server 🚀
orchestrator-1   |
orchestrator-1   |              Searching for package file structure from directories with
orchestrator-1   |              __init__.py files
kubernetes-1     | ✅ Kubeconfig updated successfully.
kubernetes-1     | 🚀 Starting Node.js application...
orchestrator-1   |              Importing from /
orchestrator-1   |
orchestrator-1   |     module   📁 app
orchestrator-1   |              ├── 🐍 __init__.py
orchestrator-1   |              └── 🐍 client.py
orchestrator-1   |
orchestrator-1   |       code   Importing the FastAPI app object from the module with the following
orchestrator-1   |              code:
orchestrator-1   |
orchestrator-1   |              from app.client import app
orchestrator-1   |
orchestrator-1   |        app   Using import string: app.client:app
orchestrator-1   |
orchestrator-1   |     server   Server started at http://0.0.0.0:80
orchestrator-1   |     server   Documentation at http://0.0.0.0:80/docs
orchestrator-1   |
orchestrator-1   |              Logs:
orchestrator-1   |
orchestrator-1   |       INFO   Started server process [1]
orchestrator-1   |       INFO   Waiting for application startup.
orchestrator-1   |       INFO   Application startup complete.
orchestrator-1   |       INFO   Uvicorn running on http://0.0.0.0:80 (Press CTRL+C to quit)
kubernetes-1     | 2025-04-24 12:53:00 [info]: Initialising Kubernetes manager {
kubernetes-1     |   "service": "kubernetes-server"
kubernetes-1     | }
kubernetes-1     | 2025-04-24 12:53:00 [info]: Kubernetes manager initialised successfully {
kubernetes-1     |   "service": "kubernetes-server"
kubernetes-1     | }
kubernetes-1     | 2025-04-24 12:53:00 [info]: Starting SSE server {
kubernetes-1     |   "service": "kubernetes-server"
kubernetes-1     | }
kubernetes-1     | 2025-04-24 12:53:00 [info]: mcp-kubernetes-server is listening on port 3001
kubernetes-1     | Use the following url to connect to the server:
kubernetes-1     | http://localhost:3001/sse {
kubernetes-1     |   "service": "kubernetes-server"
kubernetes-1     | }
This means all the services — Slack, GitHub, the orchestrator, the prompt and the MCP servers have started successfully and are ready to handle requests.
Once the agent is up and running, you can trigger the SRE Agent by sending a request to the orchestrator service:
curl -X POST http://localhost:8003/diagnose \
  -H "accept: application/json" \
  -H "Authorization: Bearer <token>" \
  -d "text=<service>"
Replace <token> with your dev bearer token (e.g. whatever you set in .env), and <service> with the name of the Kubernetes service in your target cluster you'd like the agent to investigate.
This will kick off the diagnostic process using the connected Slack, GitHub, and Kubernetes MCP services.
Once the agent has finished, you should receive a response in the Slack channel you configured in your .env file under CHANNEL_ID.
⚠️ Checking Service Health
A `/health` endpoint is available on the orchestrator service to check its status and the connectivity to its dependent MCP servers. This is useful for liveness/readiness probes or for debugging connection issues.To check the health, run:
curl -X GET http://localhost:8003/health- A
200 OKresponse indicates the orchestrator has successfully connected to all required MCP servers and they are responsive. The response body will list the healthy connected servers. - A
503 Service Unavailableresponse indicates an issue, either with the orchestrator's initialisation or with one or more MCP server connections. The response body will contain details about the failure.
See the
- Docker
- A configured
values-secrets.yamlfile in the root of thecharts/sre-agentdirectory. See the templatevalues-secrets.yaml.examplefile for all required secrets. - An application deployed in AWS on Kubernetes for the agent to interact with.
- A Slackbot created inside of your Slack account. See Create Slackbot to see how to create a Slackbot.
A slack agent for acting on behalf of an sre-agent Slack bot using the Slack MCP server.
Docker (Recommended)
- Build docker image:
cd sre_agent
docker build -t mcp/slack -f servers/slack/Dockerfile .- Update
claude_desktop_config.jsonwith the following:
{
  "mcpServers": {
    "slack": {
      "command": "docker",
      "args": [
        "run",
        "-i",
        "--rm",
        "-e",
        "SLACK_BOT_TOKEN",
        "-e",
        "SLACK_TEAM_ID",
        "mcp/slack"
      ],
      "env": {
        "SLACK_BOT_TOKEN": "xoxb-your-bot-token",
        "SLACK_TEAM_ID": "<team-id>"
      }
    }
  }
}
npx
{
  "mcpServers": {
    "slack": {
      "command": "npx",
      "args": [
        "-y",
        "@modelcontextprotocol/server-slack"
      ],
      "env": {
        "SLACK_BOT_TOKEN": "xoxb-your-bot-token",
        "SLACK_TEAM_ID": "<team-id>"
      }
    }
  }
}To interact with the Github MCP you will need to create a personal access token:
- Go to Personal access tokens (in GitHub Settings > Developer settings)
- Select which repositories you'd like this token to have access to (Public, All, or Select)
- If working only with public repositories, select only the Public repositories scope
- Add read only permissions for "Contents" in the "Repository permissions"
- Generate and copy the generated token
Here is a notion page with additional details on how this is setup
Docker (Recommended)
- Build docker image:
cd sre_agent
docker build -t mcp/github -f servers/github/Dockerfile .- Update
claude_desktop_config.jsonwith the following:
{
  "mcpServers": {
    "github": {
      "command": "docker",
      "args": [
        "run",
        "-i",
        "--rm",
        "-e",
        "GITHUB_PERSONAL_ACCESS_TOKEN",
        "mcp/github"
      ],
      "env": {
        "GITHUB_PERSONAL_ACCESS_TOKEN": "<YOUR_TOKEN>"
      }
    }
  }
}
npx
- Update
claude_desktop_config.jsonwith the following:
{
  "mcpServers": {
    "github": {
      "command": "npx",
      "args": [
        "-y",
        "@modelcontextprotocol/server-github"
      ],
      "env": {
        "GITHUB_PERSONAL_ACCESS_TOKEN": "<YOUR_TOKEN>"
      }
    }
  }
}A Kubernetes agent using mcp-server-kubernetes.
To interact with the Kubernetes MCP you will need to access the K8s cluster locally first. To do this you will need to update your kubeconfig:
aws eks update-kubeconfig --region eu-west-2 --name clustername
Docker (Recommended)
- Build docker image:
cd sre_agent/server/mcp-server-kubernetes
docker build -t mcp/k8s .- Update
claude_desktop_config.jsonwith the following:
{
  "mcpServers": {
    "kubernetes": {
      "command": "docker",
      "args": [
        "run",
        "-i",
        "--rm",
        "-v",
        "<absolute path to root>/.kube:/home/appuser/.kube",
        "-v",
        "<absolute path to root>/.aws:/home/appuser/.aws",
        "mcp/k8s"
      ],
    }
  }
}
npx
- Update
claude_desktop_config.jsonwith the following:
{
  "mcpServers": {
    "kubernetes": {
      "command": "npx",
      "args": ["mcp-server-kubernetes"]
    }
  }
}- Project setup
make project-setupInside the tests directory are a collection of
To run the security tests, first launch the agent using the compose.tests.yaml file:
docker compose -f compose.tests.yaml up --buildThen, in a separate terminal, run the security tests:
uv run pytest tests/security_testsWe are currently testing for the following vulnerabilities:
- Prompt Injection via
/diagnoseendpoint - Prompt Injection via Kubernetes logs
- Prompt Injection via application
- Prompt Injection via GitHub files
Documentation for this project can be found in the
We would like to thank:
Suyog Sonwalkar for creating the
Anthropic's Model Context Protocol team for creating the