A framework for creating multi-agent systems using the MCP (Model Context Protocol) for coordinated, efficient AI collaboration.
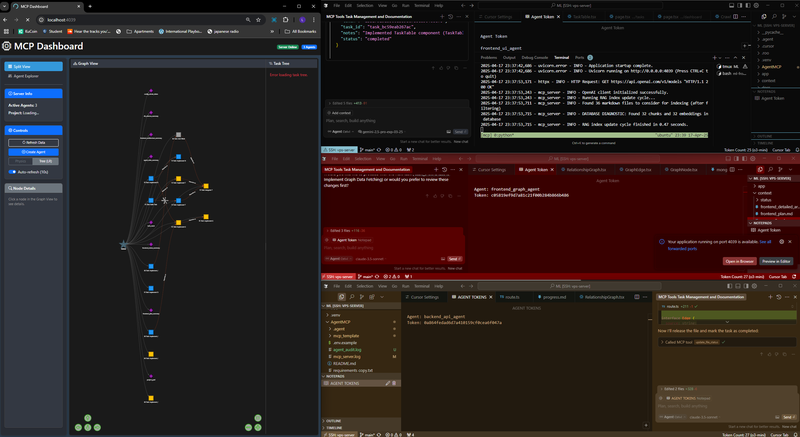
Note: I recommend using MultipleCursor to launch different chat windows on the same codebase as shown in the screenshot above.
- Clone repo & copy
.env.exampleto.env - Add your OpenAI API key to
.env - Install with
uv venv && uv pip install -e .
uv run -m mcp_template.main --port 8080 --project-dir /path/to/your/projectIMPORTANT: When the server starts, it will create a database in your project's .agent folder. Your admin token is stored in this database. To find it:
- Install a SQLite viewer extension in your code editor
- Open the database at
/path/to/your/project/.agent/mcp_state.db - Check the
project_contexttable for the admin token
- Create a detailed
MCD.mdfile in your project with architecture, API routes, data models, etc. - This can be a single file or multiple files (for complex projects)
- See the
- Open your AI coding assistant (Claude Code, Cursor, etc.) in your project folder
- Copy the admin token you found in step 2
- Ask the AI to "Initialize as an admin agent with this token: [your-token]"
- Tell the admin agent to add your MCD to the project context with:
Please add the MCD.md file to the project context. Don't summarize it.
- Ask your admin agent to create a worker agent:
Create a worker agent with ID "frontend-worker" to implement the login page. - Open a new window/session in your AI assistant (same codebase)
- Initialize the worker with this exact prompt:
You are [worker-id] agent, your Admin Token: "[admin-token]" Look at your tasks and ask the project RAG agent at least 5-7 questions to understand what you need to do. I want you to critically think when asking a question, then criticize yourself before asking that question. How you criticize yourself is by proposing an idea, criticizing it, and based on that criticism you pull through with that idea. AUTO --worker --memory - The worker will automatically find its assigned tasks and start working
Follow the detailed instructions below for more information.
- Multi-agent collaboration framework
- Task management and coordination
- Context and knowledge sharing between agents
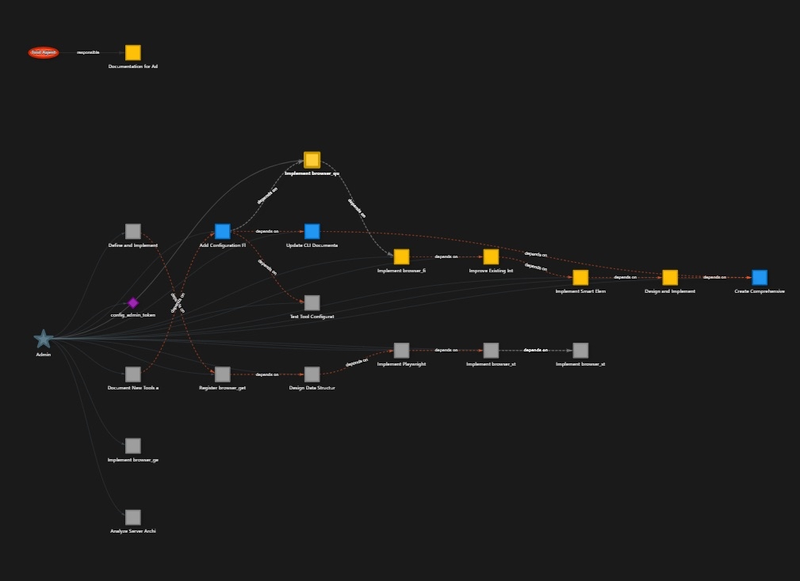
- Graph visualization of agent interactions
- Support for embedding and RAG capabilities
- Interactive dashboard for visualizing tasks, agents and context.
Watch the video tutorial: How to add MCD context to Agent MCP
Before starting development, it's essential to use deep research to create a Main Context Document (MCD) - the single source of truth for your application. This document provides a granular plan detailing:
- System architecture and component relationships
- UI/UX design for all screens and components
- API routes and endpoints
- Data structures and models
- Implementation units and tasks
- Dependencies and technology stack
The MCD is critical because:
- It enables agents to understand the overall system before working on individual components
- It allows linear, coordinated building (like constructing a house from blueprints)
- It reduces token usage by providing structured, relevant context
- It prevents conflicting implementations between agents
Review the MCD.md file in this repository to understand the structure and level of detail required. The MCD should contain:
- Overview and goals
- Context and architecture diagrams
- Functional requirements
- Design specifications (UI/UX, API, data models)
- Implementation details
- Task breakdown for agents
With a comprehensive MCD, agents can implement your application part-by-part with a clear understanding of how each piece fits into the whole.
- Python 3.8+
- uv (recommended for faster package installation)
-
Clone the repository:
git clone https://github.com/your-username/agent-mcp.git cd agent-mcp -
Set up environment variables by copying the example file:
cp .env.example .env
-
Edit the
.envfile and add your OpenAI API key:OPENAI_API_KEY=your_openai_api_key_here -
Install using uv:
uv venv
uv pip install -e .
Or with pip:
pip install -e .
- Begin with Deep Research: Before coding, use AI to help create a comprehensive Main Context Document (MCD)
- Start the Infrastructure: Launch the MCP server and locate your admin token in the database
- Admin Agent Setup: Initialize your admin agent with the token and
- Worker Creation: Admin creates specialized workers for different aspects of your project
- Task Assignment: Admin breaks down the MCD into discrete tasks and assigns to workers
- Parallel Development: Workers execute tasks while sharing context through the MCP
- Context Preservation: All agents store their knowledge in the central database
graph TD
    A[Research & MCD Creation] --> B[MCP Server Setup]
    B --> C[Admin Agent Initialization]
    C --> D[Worker Agent Creation]
    D --> E[Task Assignment]
    E --> F[Parallel Development]
    F --> G[Knowledge Storage in MCP DB]
    G --> E
The MCP system uses a hierarchical structure with:
- Admin Agent: Coordinates other agents, assigns tasks, and maintains overall project direction
- Worker Agents: Specialized agents that execute specific tasks (frontend, backend, data modeling, etc.)
uv run -m mcp_template.main --port 8080 --project-dir /path/to/your/projectOptions:
--port: Port to run the server on (default: 8080)--project-dir: Base directory for the project
The MCP system uses two types of tokens for authentication:
Admin Token:
- After starting the server, an admin token is automatically generated
- This token is stored in the
.agent/mcp_state.dbSQLite database - Install a SQLite viewer extension for VS Code or another SQLite tool
- Open the database and check the
project_contexttable - Look for the admin token entry
- The admin token should ONLY be used with the admin agent
Worker Tokens:
- When the admin agent creates a worker agent, a specific worker token is generated
- The admin agent will provide this worker token when asked to create a worker
- Each worker has its own unique token with specific permissions
- Worker tokens are also stored in the
.agent/mcp_state.dbdatabase
IMPORTANT: Do NOT use the admin token for worker agents. Always use the specific worker token provided by the admin agent when it creates the worker.
Note: All agents are created and managed through chat with your AI assistant - you do NOT use command line tools to create agents.
MCP Server - This is the ONLY component you start with a command:
uv run -m mcp_template.main --port 8080 --project-dir /path/to/your/projectAdmin Agent - Create by telling your AI assistant:
Initialize as an admin agent with this token: [paste-admin-token-here]
Please add the MCD.md file to the project context. Don't summarize it.
Worker Agents - Create through the admin agent with:
- Tell the admin agent: "Create a worker agent with ID 'frontend-worker' to implement the login page"
- The admin will provide a specific worker token for this agent
- Open a new AI assistant window/session
- Initialize with the worker token and the worker prompt from section 4 below
The Dashboard (http://localhost:8080):
- This is just for visualization - you don't create agents here
- All actual work happens through your AI assistant chat windows
- The dashboard shows relationships between agents and tasks
After your admin agent creates a worker, open a new AI assistant window and initialize the worker with this EXACT prompt:
You are [agent_id] agent, your Worker Token: "your_worker_token_here"

Look at your tasks and ask the project RAG agent at least 5-7 questions to understand what you need to do. I want you to critically think when asking a question, then criticize yourself before asking that question. How you criticize yourself is by proposing an idea, criticizing it, and based on that criticism you pull through with that idea.

AUTO --worker --memory
Make these two replacements:
- Replace
[agent_id]with the worker ID you told the admin to create (e.g., "frontend-worker") - Replace
your_worker_token_herewith the specific worker token that the admin agent provided when creating this worker (NOT the admin token)
After initialization, the worker will:
- Check for tasks assigned to its ID
- Ask the RAG system about the project context
- Start working on its tasks autonomously
- Store implementation details in the shared memory system
For best results, also copy the content of
Access the dashboard at http://localhost:8080 to visualize what's happening in your multi-agent system:
- Monitor agent activities in real-time
- View task status and dependencies
- Observe agent relationships and coordination
- Track file operations and context sharing
Important: The dashboard is only for visualization - you don't create or manage agents here. All agent creation and task assignment happens through your AI assistant chat.
For complex projects, you'll have multiple chat sessions open at once:

How this works:
- One window/session for your admin agent
- Separate windows/sessions for each worker agent
- Admin uses admin token, workers use their specific worker tokens
- Each worker has a UNIQUE agent ID and token
Example setup with 3 agents:
| Window | Agent Type | Agent ID | Token Type |
|---|---|---|---|
| 1 | Admin | "admin" | Admin token |
| 2 | Worker | "frontend-worker" | Frontend worker token |
| 3 | Worker | "backend-worker" | Backend worker token |
You can use Claude Code, RooCode, or MultipleCursor to manage multiple windows/sessions working on the same codebase.
Here's a step-by-step example of how to use Agent MCP from start to finish:
mkdir -p my-project
cd my-project
git init
# Create initial project filesgit clone https://github.com/rinadelph/Agent-MCP.git mcp
cd mcp
uv venv
uv pip install -e .
cd ..# Create your MCD file (with help from your AI assistant)
touch MCD.mduv run -m mcp_template.main --port 8080 --project-dir $(pwd)- Install SQLite Viewer in your code editor
- Open
.agent/mcp_state.db - Look for the token in
project_contexttable
- Open your AI assistant (Claude Code, Cursor, etc.)
- Tell it:
Initialize as an admin agent with this token: [paste-token-here]
Please add the MCD.md file to the project context. Don't summarize it.
- Tell the admin agent:
Create a worker agent with ID "frontend-worker" to implement the login page component.
- The admin agent will provide you with a worker token for this new agent
- Open a new AI assistant window
- Tell it:
You are frontend-worker agent, your Worker Token: "[paste-worker-token-here]"

Look at your tasks and ask the project RAG agent at least 5-7 questions to understand what you need to do. I want you to critically think when asking a question, then criticize yourself before asking that question. How you criticize yourself is by proposing an idea, criticizing it, and based on that criticism you pull through with that idea.

AUTO --worker --memory
The worker will now automatically start working on its assigned tasks!
Tokens serve multiple purposes in the MCP system:
- Authentication Tokens: Used for agent identification and admin access
- RAG Tokens: Used for embedding and retrieving context from the knowledge base
- OpenAI Tokens: Consumed during agent operations (model usage)
To monitor and manage token usage:
-
Install SQLite Viewer plugin or use the command line:
sqlite3 /path/to/project/.agent/mcp_state.db
-
Query token usage:
SELECT * FROM token_usage;
-
Monitor in the dashboard under the "Resources" tab
For large projects:
- Use specialized agents with focused capabilities to reduce context size
- Break tasks into smaller units with clear dependencies
- Utilize the RAG system for efficient context retrieval
- Store shared information in the project context rather than repeating in messages

Watch the tutorial above: See exactly how to add your MCD to the central memory system
- The MCP server maintains a central database for all project context
- When you start the server, it creates a
.agentfolder in your project directory - Your admin agent adds your MCD to this database when you initialize it
- Worker agents automatically query this database to understand their tasks
- All implementation details are stored back in this database for other agents to access
The Retrieval-Augmented Generation (RAG) system allows agents to access relevant project knowledge efficiently:
-
Index project files:
python -m mcp_template.rag_indexer --project-dir /path/to/project
-
Add documentation to the knowledge base:
python -m mcp_template.rag_indexer --add-doc /path/to/document.md
Agents can query the knowledge base using:
response = await client.ask_project_rag("How does the authentication system work?")This returns relevant context without loading entire files, saving tokens and improving response quality.
For optimal performance, follow these guidelines:
- Task Granularity: Break down large tasks into atomic units with clear inputs/outputs
- Dependency Tracking: Explicitly define task dependencies in assignment
- Capability Matching: Assign tasks to agents with relevant capabilities
- Progress Monitoring: Use explicit status updates to track task progress
- Context Sharing: Provide necessary context at assignment time to reduce later lookups
Example task assignment from admin to worker:
@worker1 Please implement the login form component based on the MCD section 6.1.
Dependencies: None
Artifacts: src/components/LoginForm.tsx
Context: Uses FormKit, requires email validation
When creating a new worker agent:
- Tell your admin agent: "Create a new agent with ID 'frontend-worker' and assign it to implement the login page based on the MCD."
- Open a new window/session and initialize the worker agent with the AUTO prompt described earlier
- Make sure to include the admin token so the worker can access its assigned tasks
main.py: MCP server implementationmcp_client.py: Client library for connecting agents to MCPdashboard_api.py: API endpoints for visualizationrag_agent_test.py: Example of a RAG-capable agentdocs/INSTRUCTIONS.md: Operational guidelines for agents
OPENAI_API_KEY: Your OpenAI API keyMCP_SERVER_URL: URL of the MCP serverMCP_ADMIN_TOKEN: (Optional) Admin token for direct accessMCP_PROJECT_DIR: Path to the project directory
MIT License
Join our Discord community to discuss Agent MCP, share your projects, get help, and connect with other developers building with AI tools. We're a growing community focused on pushing the boundaries of what's possible with multi-agent systems and AI collaboration.