This is a quick start guide that provides the basic building blocks to set up a remote Model Context Protocol (MCP) server using Azure Container Apps. The MCP server is built using Node.js and TypeScript, and it can be used to run various tools and services in a serverless environment.
- Install VS Code
- Install GitHub Copilot and GitHub Copilot Chat extensions
- Install the Azure Developer CLI (azd)
You can run these commands from the VSCode Terminal
- Clone this repository
git clone https://github.com/azure-samples/mcp-container-ts.git- Log in to your Azure account
azd auth login- Provision and deploy the project (ensure you are in the folder of the cloned repo when running this command):
azd up- Once the deployment is complete, you can access the MCP server using the URL provided in the output. The URL will look something like this:
https://<env-name>.<container-id>.<region>.azurecontainerapps.io- You can configure the MCP server in your local VS Code environment by adding the URL to the
mcp.jsonfile or manually adding it as described in the previous section:
{
  "servers": {
    "mcp-server-sse-remote": {
      "type": "sse",
      "url": "https://<your-app-name>.<region>.azurecontainerapps.io/sse"
    }
  }
}
Note
The URL for the MCP server will be different for each deployment. Make sure to update the URL in the mcp.json file or in your MCP client configuration accordingly.
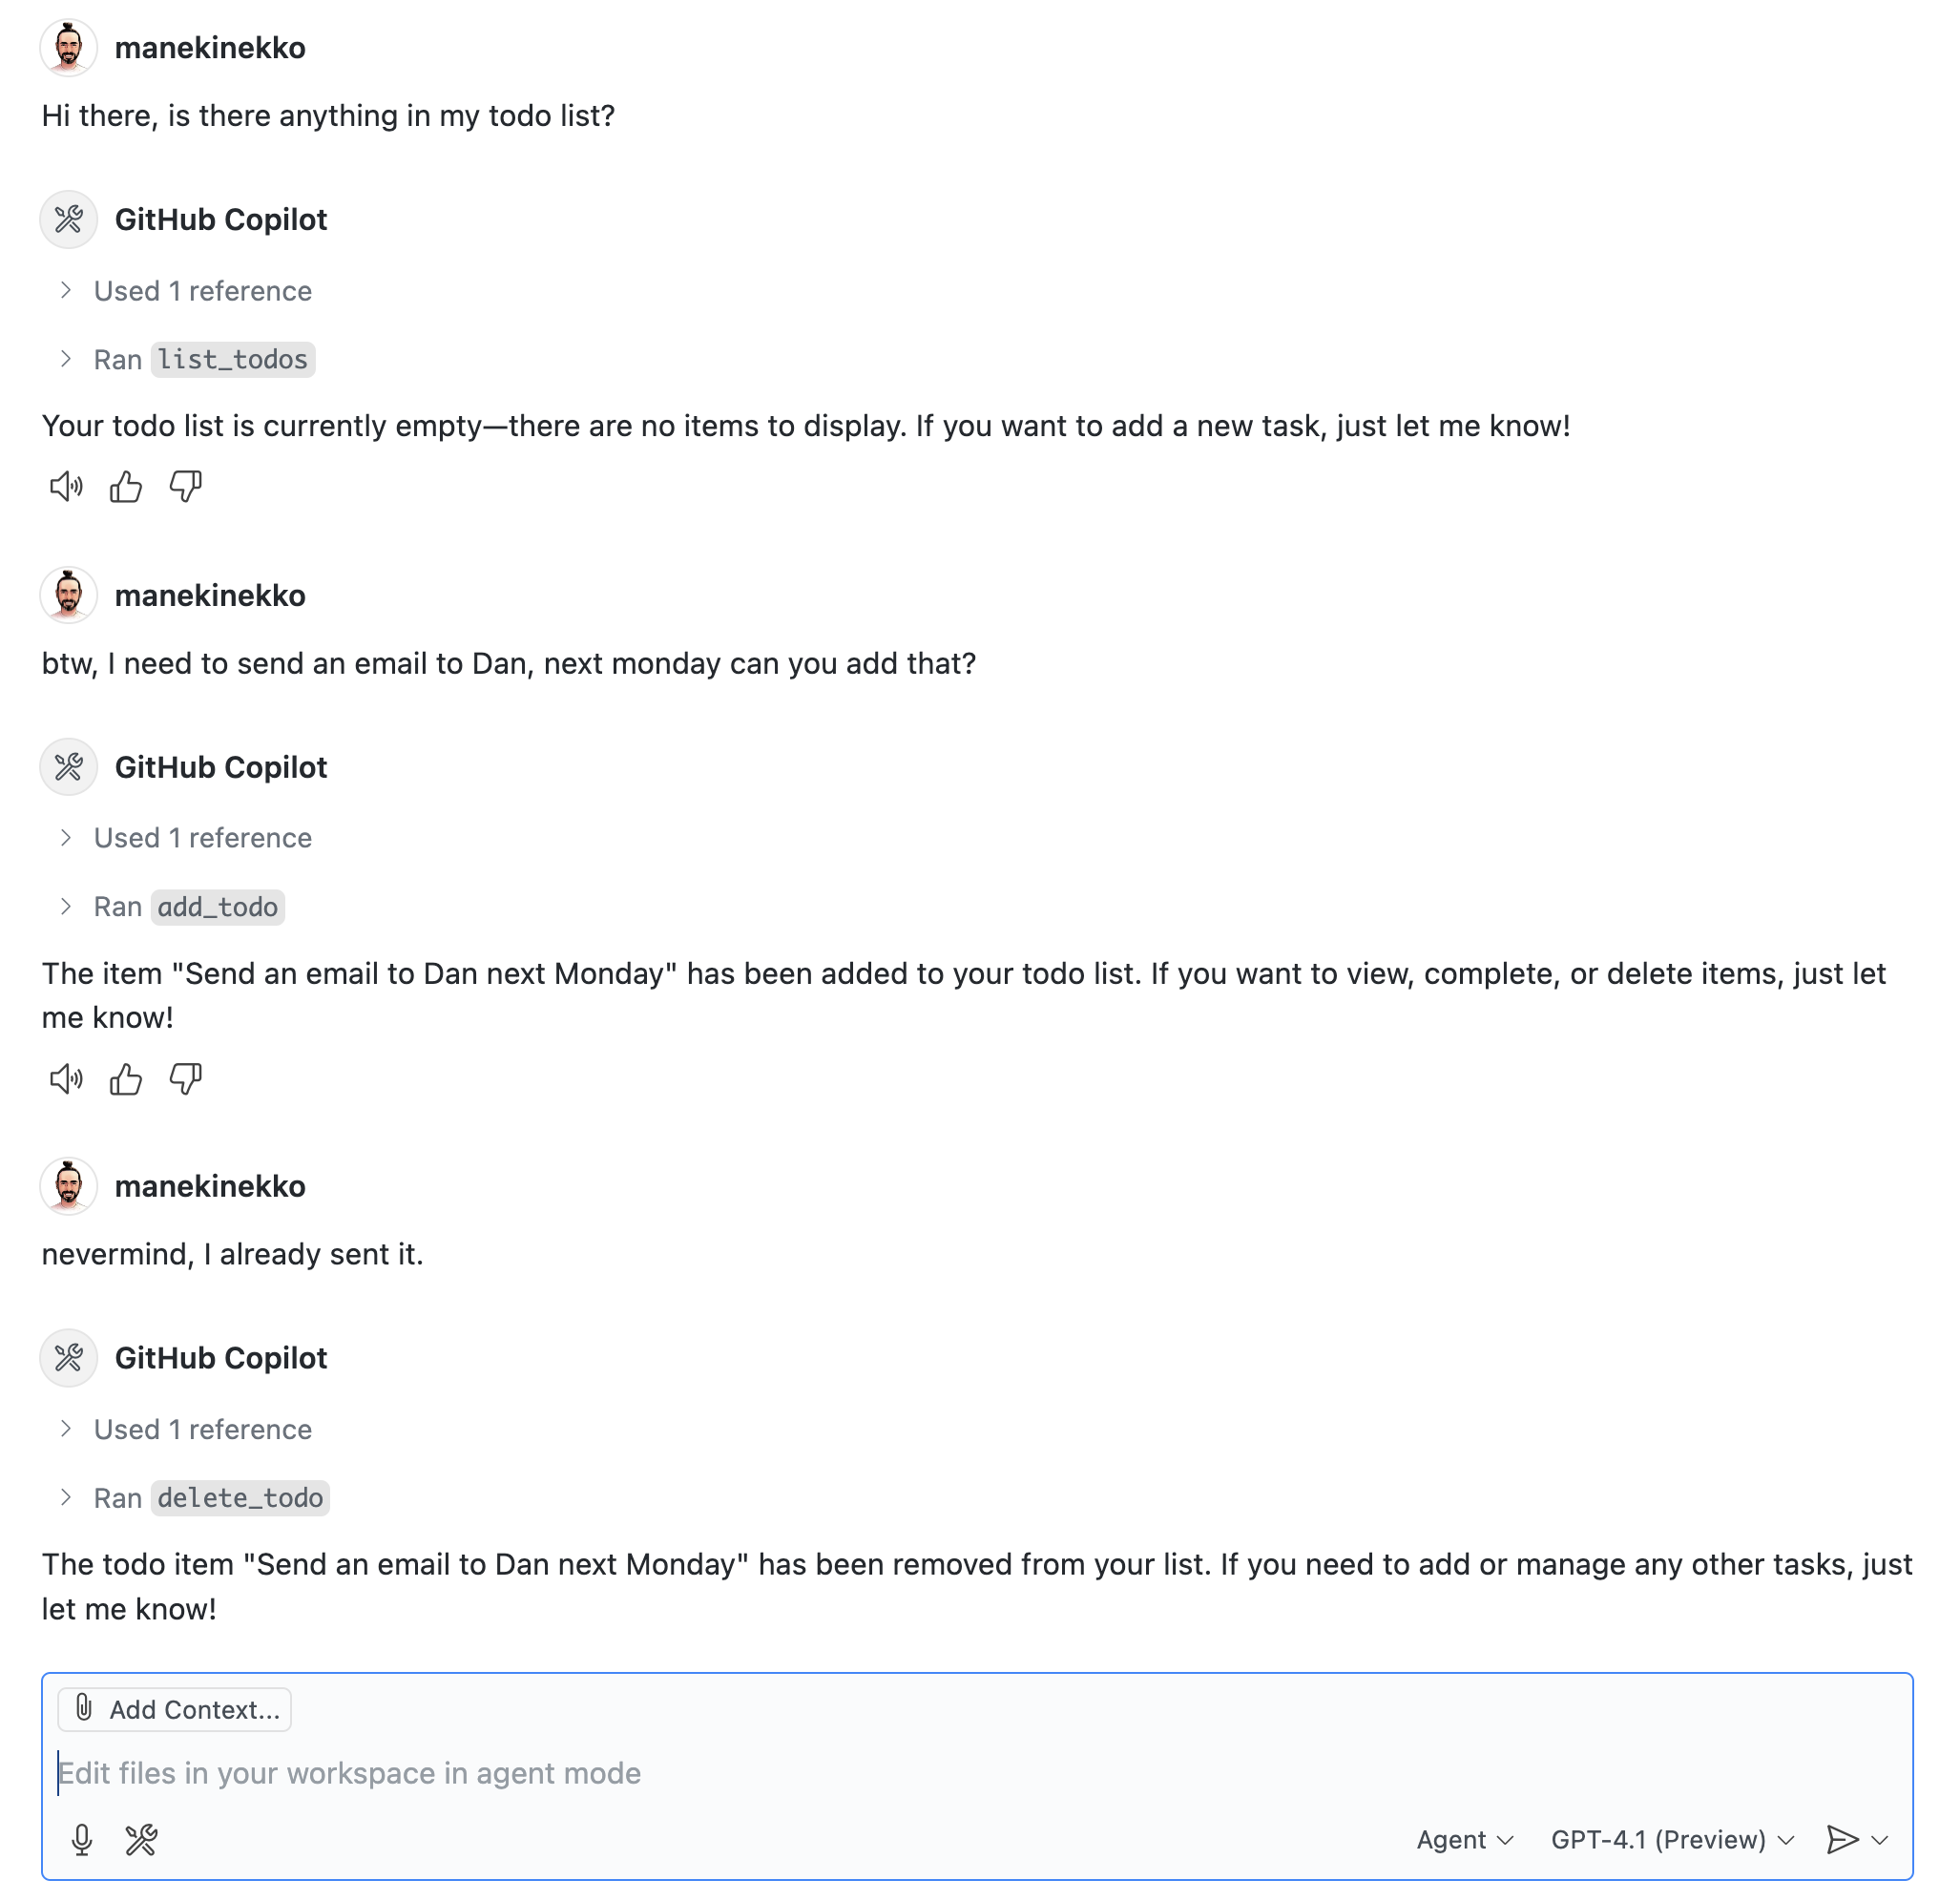
- If everything is configured correcly, you should see something like the below when prompting GitHub Copilot in Agent mode:
- If you were simply testing the deployment, you can remove and clean up all deployed resources by running the following command to avoid incurring any costs:
azd downThe Model Context Protocol (MCP) is a protocol that allows different AI models and tools to communicate with each other. It provides a standardized way for models to share information and collaborate on tasks. The MCP server acts as a bridge between different models and tools, allowing them to work together seamlessly.
Below is the architecture diagram for a typical MCP server setup:
flowchart TD
    user(("fa:fa-users User"))
    host["VS Code, Copilot, LlamaIndex, Langchain..."]
    client[MCP SSE Client]
    agent[Agent]
    AzureOpenAI([Azure OpenAI])
    GitHub([GitHub Models])
    OpenAI([OpenAI])
    server([MCP SSE Server])
    tools["fa:fa-wrench Tools"]
    db[(Sqlite DB)]

    user --> hostGroup
    subgraph hostGroup["MCP Host"]
        host -.- client & agent
    end

    agent -.- AzureOpenAI & GitHub & OpenAI

    client a@ ---> |"Server Sent Events"| container

    subgraph container["ACA Container (*)"]
      server -.- tools
      tools -.- add_todo
      tools -.- list_todos
      tools -.- complete_todo
      tools -.- delete_todo
    end

    add_todo b@ --> db
    list_todos c@--> db
    complete_todo d@ --> db
    delete_todo e@ --> db

    %% styles

    classDef animate stroke-dasharray: 9,5,stroke-dashoffset: 900,animation: dash 25s linear infinite;

    classDef highlight fill:#9B77E8,color:#fff,stroke:#5EB4D8,stroke-width:2px

    classDef dim fill:#f0f0f0,color:#000,stroke:gray,stroke-width:1px

    class a animate
    class b animate
    class c animate
    class d animate
    class e animate

    class hostGroup dim
    class host dim
    class client dim
    class agent dim
    class GitHub dim
    class AzureOpenAI dim
    class OpenAI dim
    class container highlight
Important
(*) This guide implements only the SSE MCP server. The MCP host and clients are not provided. If you are looking for a complete solution, with a custom MCP host, client and both HTTP and SSE MCP servers please check out this other repository.
You have a few other options besides azd up locally for getting started with this template. The quickest way to get started is GitHub Codespaces, since it will setup all the tools for you, but you can also set it up locally.
You can run this template virtually by using GitHub Codespaces. The button will open a web-based VS Code instance in your browser:
-
Open the template (this may take several minutes):

-
Open a terminal window
-
Continue with the deploying steps
A related option is VS Code Dev Containers, which will open the project in your local VS Code using the Dev Containers extension:
-
Start Docker Desktop (install it if not already installed)
-
Open the project:
-
Open a terminal window
-
Start the server

npm startIf you prefer to run the MCP server locally, you can do so by following these steps:
You need to have the following tools installed on your local machine:
- Clone this repository:
git clone https://github.com/Azure-Samples/mcp-container-ts
cd mcp-container-ts-
Open the project folder
-
Install dependencies
npm install- Start the server
npm startNote
When the applications starts, the server will create an in-memory SQLite database. This database is used to store the state of the tools and their interactions with the MCP server.
The quickest way to connect to the MCP server is the use the provided
{
  "servers": {
    "mcp-server-sse": {
      "type": "sse",
      "url": "http://localhost:3000/sse"
    }
  }
}
Once you have this file opened, you can click on the "start" inlined action button that will connect the MCP server and fetch the available tools.
- Add MCP Server from command palette and add URL to your running Function app's SSE endpoint:
http://localhost:3000/sse- Select HTTP (Server-Sent-Events) for the type of MCP server to add.
- Enter the URL to your running function app's SSE endpoint
- Enter the server ID. (This can be any name you want)
- Choose if you want to run this in your User settings (available to all apps for you) or to your Workspace settings (available to this app, only)
- In Copilot chat agent mode enter a prompt to trigger the tool, e.g., select some code and enter this prompt
I need to send an email to Dan, please add that to my todo list.- When prompted to run the tool, consent by clicking Continue,
- When you're done, press Ctrl+C in the terminal window to stop the func.exe host process, and List MCP Servers from command palette and stop the local server.
- In a new terminal window, install and run MCP Inspector
npm run inspect- CTRL click to load the MCP Inspector web app from the URL displayed by the app (e.g. http://0.0.0.0:5173/#resources)
- Set the transport type to SSE
- Set the URL to your running Function app's SSE endpoint and Connect:
http://localhost:3000/sse- List Tools. Click on a tool and Run Tool.
- Learn more about related MCP efforts from Microsoft